How to clean a switch socket?
Leave a message
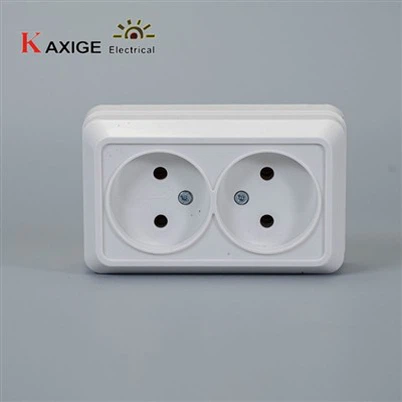
As a supplier of switch sockets, I understand the importance of maintaining these essential electrical components. A clean switch socket not only enhances the aesthetic appeal of your space but also ensures optimal functionality and safety. In this blog, I'll share some practical tips on how to clean a switch socket effectively.
Why Cleaning Switch Sockets Matters
Before diving into the cleaning process, let's briefly discuss why it's crucial to keep your switch sockets clean. Over time, dust, dirt, and grime can accumulate on the surface of switch sockets. This buildup can not only make your walls look unsightly but also pose potential safety risks. For instance, dust and debris can interfere with the proper connection of plugs, leading to overheating or electrical malfunctions. Additionally, a dirty switch socket can attract moisture, which may cause corrosion and damage to the internal components.
Preparing for the Cleaning Process
Safety should always be your top priority when cleaning switch sockets. Before you start, make sure to turn off the power supply to the socket at the circuit breaker. This will prevent the risk of electric shock. You can use a voltage tester to double - check that the power is off.
Gather the necessary cleaning supplies. You'll need a soft, dry cloth, a mild cleaning solution (such as a mixture of water and a small amount of dish soap), a cotton swab, and a small brush with soft bristles. Avoid using abrasive cleaners or solvents, as they can damage the surface of the switch socket.
Cleaning the Surface of the Switch Socket
Start by using the dry cloth to gently wipe away any loose dust and debris from the surface of the switch socket. Be careful not to apply too much pressure, as this could cause the switch to move or damage the socket.
If there are stubborn stains or dirt on the surface, dampen the cloth with the mild cleaning solution. Wring out the cloth thoroughly so that it's only slightly moist. Then, gently wipe the surface of the switch socket in a circular motion. Pay special attention to the edges and corners, where dirt tends to accumulate.
For hard - to - reach areas, such as the gaps between the switch and the socket, use a cotton swab dipped in the cleaning solution. Carefully clean these areas to remove any dirt or grime.
Cleaning the Switch Itself
The switch is an important part of the switch socket, and it also needs to be cleaned. Use the small brush with soft bristles to gently clean the surface of the switch. Make sure to clean both the top and the sides of the switch.
If the switch has a lamp indicator, be extra careful when cleaning it. You can use a dry cloth to wipe the indicator gently. For more detailed cleaning, a cotton swab can be used, but avoid getting the indicator wet. Our 73V 2 Gang Switch with Lamp Indicator is a popular product, and proper cleaning will ensure its long - term performance.
Cleaning the Socket Holes
The socket holes are where the plugs are inserted, and they can collect a lot of dust and dirt. Use the small brush to gently clean the inside of the socket holes. Be careful not to push the dirt further into the socket.
If there is a significant amount of dirt or debris in the socket holes, you can use a compressed air canister to blow out the dirt. However, make sure the power is off before using the compressed air.
Drying the Switch Socket
After cleaning, use a dry cloth to wipe away any remaining moisture from the switch socket. Make sure the switch socket is completely dry before turning the power back on. This will prevent the risk of short - circuits or other electrical problems.
Maintaining a Clean Switch Socket
To keep your switch sockets clean in the long run, develop a regular cleaning routine. Dust the switch sockets at least once a month using a dry cloth. This will prevent the buildup of dust and dirt.
Avoid using the switch socket with wet hands or in a humid environment. If there is a spill near the switch socket, clean it up immediately to prevent damage.
Special Considerations for Different Types of Switch Sockets
If you have a TV socket, such as our 73V TV Socket, the cleaning process is similar. However, be extra careful when cleaning around the connection ports. These ports are sensitive, and any damage can affect the quality of the TV signal.
For multi - gang switches like the 73V 2 Gang Switch, clean each switch and socket individually. Make sure to clean the areas between the gangs to ensure a thorough clean.
When to Replace a Switch Socket
Even with regular cleaning, switch sockets may need to be replaced over time. Signs that it's time to replace a switch socket include cracks or damage to the surface, loose connections, or if the switch doesn't work properly. If you notice any of these issues, it's best to consult a qualified electrician to replace the switch socket safely.
Conclusion
Cleaning a switch socket is a simple yet important task that can enhance the safety and functionality of your electrical system. By following these steps, you can keep your switch sockets clean and in good condition.


As a switch socket supplier, we offer a wide range of high - quality switch sockets that are designed for durability and performance. If you're interested in purchasing our products or have any questions about switch socket maintenance, we'd love to hear from you. Contact us to start a procurement discussion and find the best switch sockets for your needs.
References
- Electrical Safety Handbook.
- Guide to Home Electrical Maintenance.